Get Records in Salesforce Flow: Step-by-Step Guide
Feb 12, 2025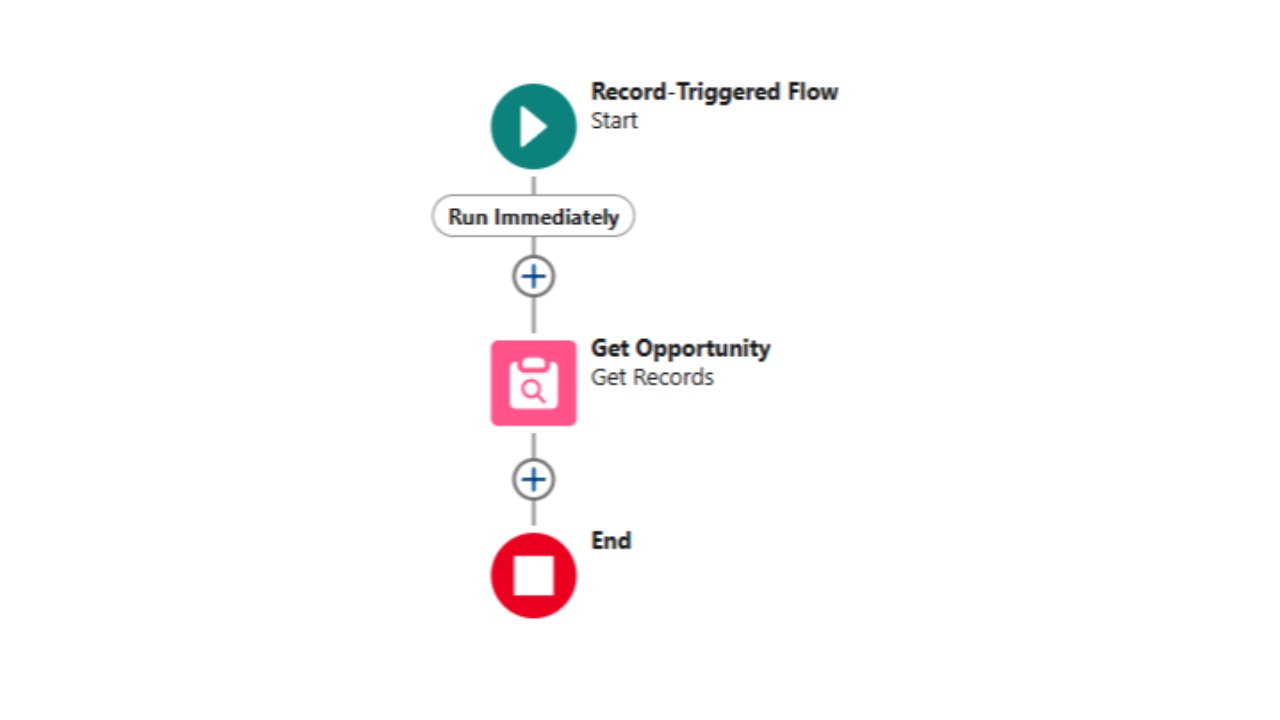
Get Records in Salesforce Flow: Step-by-Step Guide
Retrieving Salesforce records within a flow is essential for building dynamic automations. Luckily, Salesforce Flow Builder provides the Get Records element to do this with clicks, not code. By using Get Records, you can query Salesforce for records that meet certain criteria and use those records later in your flow – all without writing a single SOQL query or Apex. In this help article, we’ll show you exactly how the Get Records element works in Salesforce Flow and how to configure it step by step. By the end, you’ll be able to quickly pull in Salesforce data (like looking up related records or grabbing a specific record by criteria) and use it to power your flow logic. Let’s dive in!
What Is the Get Records Element in Salesforce Flow?
Get Records is a Data element in Flow that lets your flow find Salesforce records that meet specified filter conditions and store the results for use later in the flow. In other words, it’s how you query data within a flow. According to Salesforce’s documentation, the Get Records element “finds all Salesforce records that meet the filter and sort conditions and stores values from the retrieved records in variables”. You can think of it as the Flow equivalent of a database query: you tell it which object to look at (e.g. Accounts, Contacts, Cases), what conditions to match (e.g. “Contact’s AccountId equals X” or “Account Name equals 'Acme'”), and it will return the record(s) that match.
When would you use Get Records? Anytime your flow needs information that it doesn’t already have. For example, in a Record-Triggered Flow, you might use Get Records to fetch related records (like finding all Contacts related to an Account that was just updated). In a Screen Flow, you might use Get Records after a user provides input (like an ID or name) to fetch the corresponding record details. Essentially, whenever you need additional Salesforce data (beyond the initial context or inputs) to accomplish your automation, Get Records is your go-to element.
Some key features of Get Records to understand upfront:
- You can choose to retrieve a single record or multiple records depending on your needs.
- You can sort the results (useful if you only want the first record out of many matches, for example the most recent record).
- The element allows you to store the retrieved fields either automatically or in specified variables. Once stored, those values can be referenced by other flow elements (like Decision, Assignment, or Update Records).
- If no records are found, the output will be empty (null for a single record, or an empty collection for multiple records). It’s good practice to handle that case in your flow (more on that in tips below).
Now that we know what Get Records does, let’s walk through how to use it in Flow Builder.
Step-by-Step: How to Use Get Records in Salesforce Flow Builder
Follow these steps to configure a Get Records element in your Salesforce Flow. For this walkthrough, we’ll use an example of retrieving all Contact records related to a given Account, but the steps are similar no matter what records you need to get:
-
Add a Get Records element to your flow: In Flow Builder, create the Get Records element on the canvas at the point where you need to retrieve data. Give it a descriptive name. For example, if you are pulling contacts for an account, name it something like “Get Contacts for Account” (naming your flow elements descriptively makes the flow easier to understand later).
-
Select the Object you want to query: In the Get Records configuration pane on the right, the first setting is Object. Click to select the Salesforce object that you want to retrieve records from. In our example, choose Contact (since we want to get Contact records). If you wanted to get an Account or Case, you’d select Account, Case, etc. Choosing the correct object is important because your filters in the next step will be based on fields of this object.
-
Define Filter Conditions: Under Filter conditions, specify the criteria that the records must meet. This works just like setting up list view filters or a WHERE clause in SOQL. You can add one or multiple filter criteria. In our example, we want Contacts related to a specific Account record. Assuming this flow was triggered by an Account, we could set Contact field AccountId equals {$Record.Id} (where $Record.Id is the Account record that triggered the flow). This tells the Get Records to find all Contact records whose AccountId matches the current Account’s Id.
If you’re in a Screen Flow and have an input variable for AccountId, you would use that. You can add additional filters as needed (for instance, you might only want Contacts where Active__c = true, etc.). Make sure your filter logic is specific enough to get the records you actually need and not more. Tip: If you expect a single result (e.g., querying a unique field), you can set the criteria for that one record. If you expect multiple results, just know that all matching records will be retrieved (we’ll handle the difference in the next steps).- Optional: Sort the results if needed. You’ll see an option for Sort Order (ascending, descending, or none) and which field to sort by. Sorting is only really necessary if you plan to use “Only the first record” (see next step) or if the order of records matters for your use case. For example, if you only want the most recent record, you might sort by CreatedDate in descending order, then take the first record. If order doesn’t matter, you can leave this as Not Sorted for slightly better performance.
-
Choose how many records to store: Next, decide whether you want the flow to retrieve only the first matching record or all records that match. This setting is presented as “How Many Records to Store”. You have two choices:
- Only the first record – The Get Records will return just one record (the first match found, or the top result if you set sorting). Use this when you know or only need a single record. For example, if you’re querying a unique record (like an Account by a unique ID, or a setting record), or you only care about one record even if several meet the criteria.
- All records – The Get Records will retrieve every record that meets your filter conditions. Use this when you need to process multiple records. In our Contact example, we would select All records because an Account could have many Contacts and we want them all. Salesforce will store them in a collection variable (essentially a list of records).
If you choose “Only the first record” and more than one record happens to match your criteria, Salesforce will just take the first one (based on sort order or internal order). If you choose “All records”, you’ll get a collection of all matches. Important: If you want to work with multiple records, make sure to choose All records; if you only get the first record, the rest will be ignored. Conversely, if you only need one, it can simplify your flow to just get one. As a best practice, retrieve all records only when necessary. Salesforce Flow’s documentation notes that if you need more than one record, you should store all and then handle them (e.g., via a Loop or Decision element).
-
Choose how to store the record data: This part can sound a bit technical, but it’s basically deciding what to do with the fields of the records you retrieve. You’ll see options under How to Store Record Data:
- Automatically store all fields – This is the simplest choice. Salesforce will automatically create a variable (behind the scenes) that holds the record(s) and all their fields. We recommend this option for most cases, especially when you’re building a flow for quick implementation. It means you don’t have to manually specify each field; you can later reference any field of the retrieved records. (If you selected “All records” above, this will be a record collection variable; if you selected “First record”, it will be a single record variable.)
- Choose fields and let Salesforce do the rest – This allows you to pick specific fields to retrieve, instead of all fields. Salesforce will still create the variable for you, but it will only include the fields you specified. The advantage of this approach is performance: the fewer fields you retrieve, the less work the flow has to do, so your flow can run faster. If you have a very large object or you only need a couple of fields, this can make your flow more efficient. However, be careful: if you later try to use a field that you didn’t select here, your flow will throw an error (because that field’s value wasn’t fetched). Only use this option if you are confident which specific fields you’ll need.
- Choose fields and assign to variables – These options (there are two variations: one for when you’re storing only one record, and one for storing a collection) are more advanced. They let you manually assign the retrieved field values to existing variables that you’ve created in the flow. This gives you more control (like naming the variables or reusing variables), but it’s rarely needed for straightforward flows. It’s generally used in more complex scenarios or when you have specific reasons to use pre-defined variables. If you’re just getting started, you can skip this and stick with the automatic options above.
For most “quick solution” purposes, Automatically store all fields is a safe bet – it makes implementation faster and less error-prone. We’ll assume that choice in our example.
-
Save and finish the element: Once you’ve set the object, filters, how many records, and how to store them, click Done (or Save). You should now see your Get Records element on the flow canvas, with its label. It will show some info like the object name and filter criteria for easy reference. (If you have the option, consider adding a screenshot of the configured Get Records settings here for clarity – showing the Object, Filter, etc.) Connect the Get Records element in your flow (e.g., connect it to the prior element or the Start element if this is the first action in the flow). Now the flow will actually perform the query when it runs.
-
Use the retrieved records in your flow: Now that your flow has queried Salesforce and stored the results, you can use that data in subsequent steps. What you do next depends on your flow’s goal:
- If you retrieved a single record (Only the first record), you can directly reference that record’s fields in later elements. For example, if your Get Records (perhaps named “Get Account”) found an Account, you could use {!Get_Account.Name} or {!Get_Account.Industry} in a Screen component or in an Update Records element to update that Account. No need for loops – you have one record, just use its fields as needed.
- If you retrieved multiple records (All records), the output is a collection of records. You cannot directly reference a field on a collection without iterating, so typically you’ll use a Loop element next to process each record in that collection. For instance, after getting all Contacts for an Account, you might loop through each Contact to update a field or perform some action for each one. (See our guide on looping in flows for an example of iterating over a collection of records.) Inside the Loop, each record is treated individually (often referred to as the “current item”), so you can reference its fields and take actions (like update fields, send emails, etc.). Alternatively, if you simply need to, say, update all those records to a certain value without doing something custom per record, you could skip the loop and use an Update Records element that updates Records in a collection (Flow can bulk update a whole collection at once after you set a new value on them). The key point is: with multiple records, plan how to handle that list. Most often, you’ll loop through or at least check if the collection is empty before proceeding.
- Regardless of single or multiple, it’s wise to add a Decision element after Get Records to check if any records were actually found. For example, you might have an outcome for “Records found” vs “No records found”. In the “No records” path, you could notify the user (in a screen flow) that nothing was found, or skip certain actions in a background flow. This prevents errors down the line (like trying to use a field on a null record). It’s an optional step, but a good habit to avoid issues when, say, no record meets your filter criteria.
That’s it! At this point, your flow has successfully used Get Records to query Salesforce data. We’ve configured the element and discussed how to use its output. Next, we’ll cover a few extra tips and best practices to keep in mind when using Get Records.
Tips and Best Practices for Get Records in Flow
Using Get Records is fairly straightforward, but these tips will help you get the most out of it and avoid common pitfalls:
-
Be Specific with Your Filters: Always filter on criteria that will narrow down to the records you need. This not only ensures your flow logic is correct, but also helps performance. Querying a huge number of records unnecessarily can slow down your flow and even hit governor limits if you process them. For example, querying “Contacts where AccountId = X” is much better than querying all contacts and then filtering in the flow. The Get Records element will do the heavy lifting in the database – use that power to your advantage by being specific.
-
Use “All records” vs “First record” appropriately: If you only need one record, use Only the first record – it simplifies your flow. If you need multiple, use All records and be prepared to handle a collection. Don’t accidentally choose “First” when you meant to process many, or you’ll miss data. Conversely, if you only need one, there’s no need to retrieve an entire set. Salesforce Flow will let you handle either case, just make sure to pick the option that matches your scenario. (Remember, if you do get multiple records, you’ll likely need a Loop or another mechanism to handle them individually.)
-
Select Only Needed Fields for Performance (when necessary): By default, Get Records grabbing all fields is convenient. But if you are dealing with a very large object or you’re performance tuning, consider using the option to choose specific fields. The fewer fields you retrieve, the faster the Get Records element can run because it’s less data to bring back. This is a classic trade-off between simplicity and efficiency. For most simple flows, automatically storing all fields is fine (and avoids the risk of missing a field). If you do opt to select fields, double-check that you’ve included all the fields you plan to use in the flow; if you reference a field that wasn’t retrieved, the flow will throw a runtime error.
-
Check for No Records Found: It’s good practice to handle the scenario where your Get Records doesn’t find anything. As mentioned, you can use a Decision element after Get Records to check if the record variable Is Null (for a single record) or if the collection Is Empty (for multiple). This way, you can avoid null-pointer errors. For instance, if no record was found but your next step tries to use a field from that record, the flow would error out. Instead, route the “no records” outcome to perhaps create a new record, notify someone, or simply end the flow gracefully. This makes your automation more robust and user-friendly. (If a query absolutely must return something for the flow to continue, you might also consider using a Fault path on the Get Records element to handle the error – see our Salesforce Flow Error Handling guide for more on fault paths.)
-
Avoid Putting Get Records Inside Loops: This is a common rookie mistake that can lead to hitting governor limits. If you put a Get Records element inside a Loop, you will perform a query on each iteration of the loop – which is very inefficient and can easily exceed Salesforce’s SOQL limits if the loop runs many times. Instead, do one Get Records before the loop to get all the data you need, or accumulate criteria and query after the loop. In our best practices article, we note: “The same goes for Get Records inside loops (use one initial query or accumulate IDs and query outside the loop if needed).” In short, get all your data in one go, then loop through it, rather than querying repeatedly in a loop. This approach keeps your flow scalable and efficient.
-
Don’t Hard-Code IDs – Use Get Records for Dynamic Data: Hard-coding record Ids (like a specific Record Type Id, Queue Id, or User Id) in your flow is not recommended, because those Ids change between sandbox orgs and production. Instead, use Get Records to fetch the record by a stable attribute (like Name or some unique field). For example, if you need a certain Record Type, query the RecordType object where DeveloperName or Name matches the one you want, rather than pasting an Id. Salesforce experts recommend using a Get Records element to dynamically query for the record you need (for instance, get the Record Type by name rather than by Id). This way your flow will work in any environment as long as that record exists, without needing manual Id updates. (Our post on How to Query for a Record Type in Salesforce Flow demonstrates this approach in action – using Get Records to find a Record Type Id by its name, which is a great practical example.)
-
Name and Document Your Get Records Elements: This is more of a maintainability tip. When you have multiple Get Records in one flow, make sure each one has a clear name and (if necessary) a description. For example, names like “Get VIP Account by Name” or “Get Contacts for Opportunity” are clear. This will help you and others understand the flow later. It’s easy to forget which Get element does what if they’re just called “Get Records 1, 2, 3...”. A little clarity goes a long way in complex flows.
By following these tips, you’ll avoid most common issues and make your flows more efficient and easier to maintain. Salesforce Flow is powerful, and using data elements like Get Records wisely will ensure your automations run smoothly.
Internal Links: If you found this tutorial helpful, you might also enjoy other Salesforce Flow guides on our blog. For example, check out our article on Looping in Salesforce Flow: How to Iterate Over Multiple Records for a deeper look at processing collections of records retrieved by Get Records. And don’t miss our Salesforce Flow Best Practices guide, which covers more strategies (like avoiding hard-coded Ids and using subflows) to build scalable flows.
Now that you know how to use Get Records, you’re one step closer to Salesforce Flow mastery!
Ready to become a Flow automation pro? Take your skills to the next level with our comprehensive course. Enroll in the 2025 Salesforce Flows Complete Guide – an online, self-paced course that covers everything from beginner basics to advanced techniques. You’ll learn best practices (like efficient use of Get Records and other elements), work on real-world projects, and get expert tips to become a Flow expert. Enroll in the Salesforce Flow course here and supercharge your Salesforce automation skills today!
Salesforce Saturdays
Join the Salesforce Saturday newsletter. Every Saturday, you'll get 1 actionable tip on Salesforce technology or career growth related to the Salesforce Industry.
We hate SPAM. We will never sell your information, for any reason.
